
The map window
Everything on screen, and what each piece is for. Read this once and the other map pages will not have to keep explaining the furniture.
The two halves
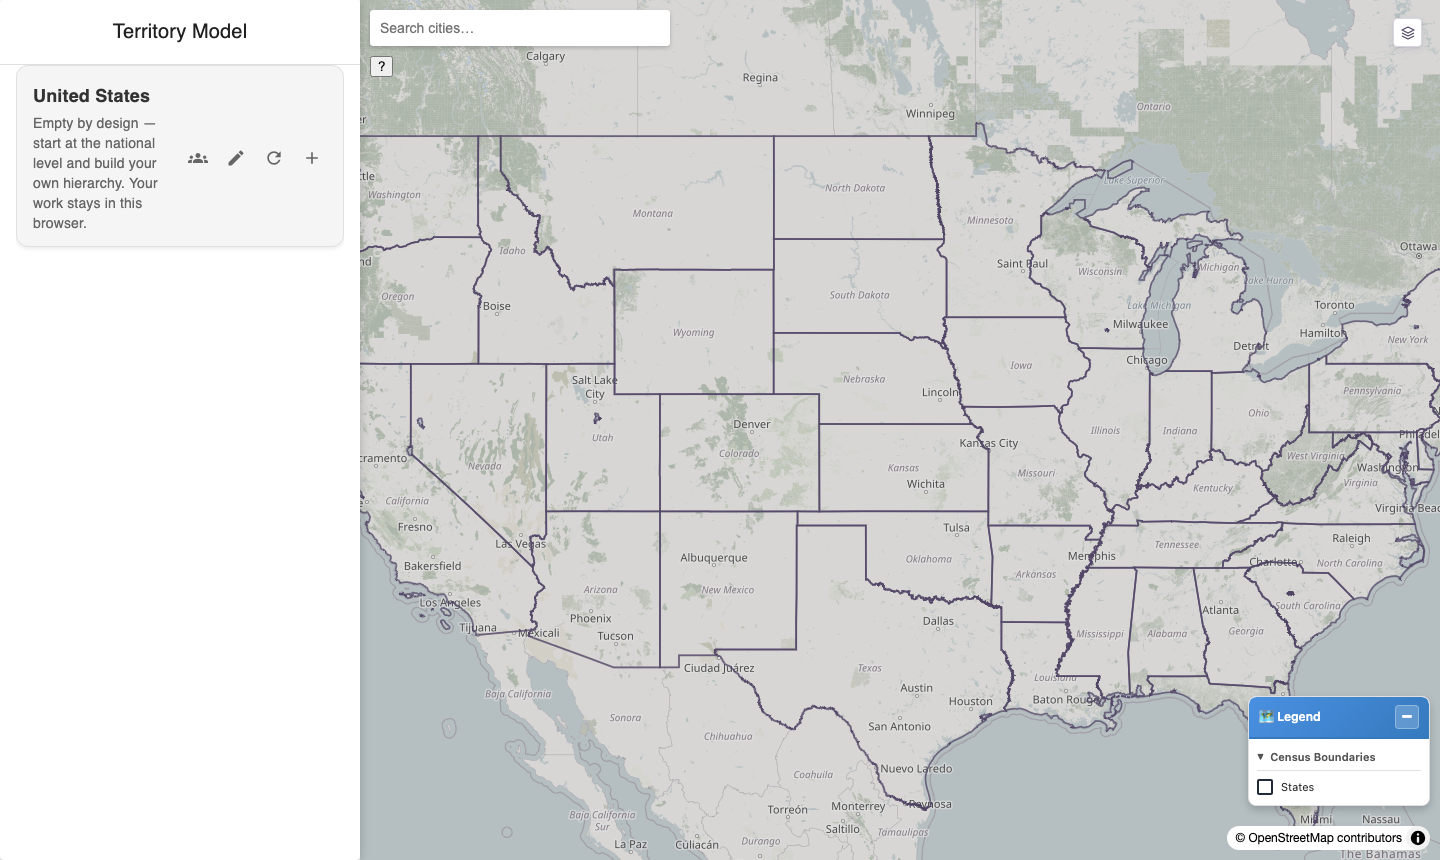
A new model, before anything is in it. The tree is on the left, the map on the right, and the four buttons on the model card are everything you can do to the model itself.
Left: the tree. Your model, your territories, and every control that changes them. Nothing on the map edits anything by itself — every edit starts with a button on this side.
Right: the map. Census geography, your territories drawn on top of it, and four controls floating over it.
The tree is where you decide; the map is where you point. If you are looking for a button and cannot find it, it is on the left.
The four controls on the map
They sit at the edges so they do not cover what you are working on.
| Where | What |
|---|---|
| Top left | City search |
| Below it | ? — the in-app help |
| Top right | Background map |
| Bottom right | Legend |
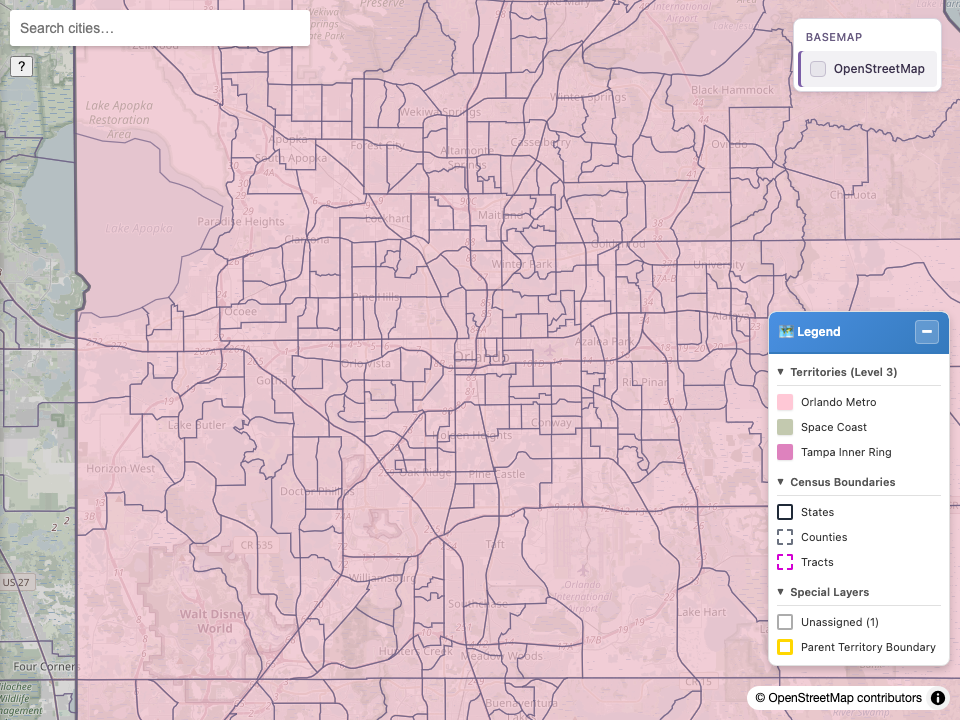
The map controls at metro zoom: city search and the ? button at the top left, the background-map list at the top right, and the legend at the bottom right. There is no census-area control here — that one is on the territory card.
🔴 There is no census-area control on the map. If you are looking for where to choose between states, counties, tracts and block groups, it is on the territory card in the tree, and only while map management mode is on — see Choosing how fine your selection is.
City search
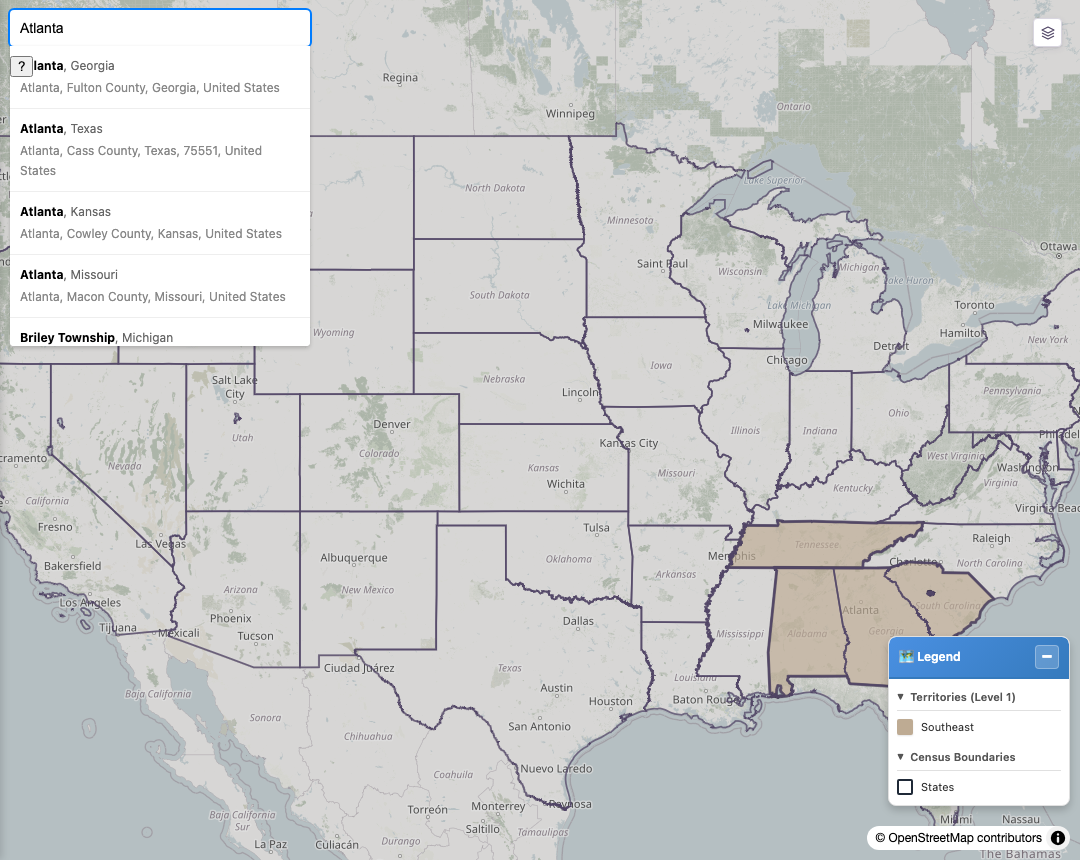
City search moves the map. It does not select anything and it does not change your territories — it is a way to get where you are working.
Type a place name and pick from the list. The map flies there.
Three things worth knowing:
- It selects nothing. Searching for Atlanta does not put Atlanta in a territory. It moves the camera and stops.
- The list is ordered by the geocoder, not by size. Several American towns share a name, so read the second line of each result — it carries the county and state.
- It is the reliable way to change zoom when you are selecting by zoom. Which census areas you can select depends on how far in you are, so moving the map is sometimes the fastest way to change what you can pick. See Choosing how fine your selection is.
The background map
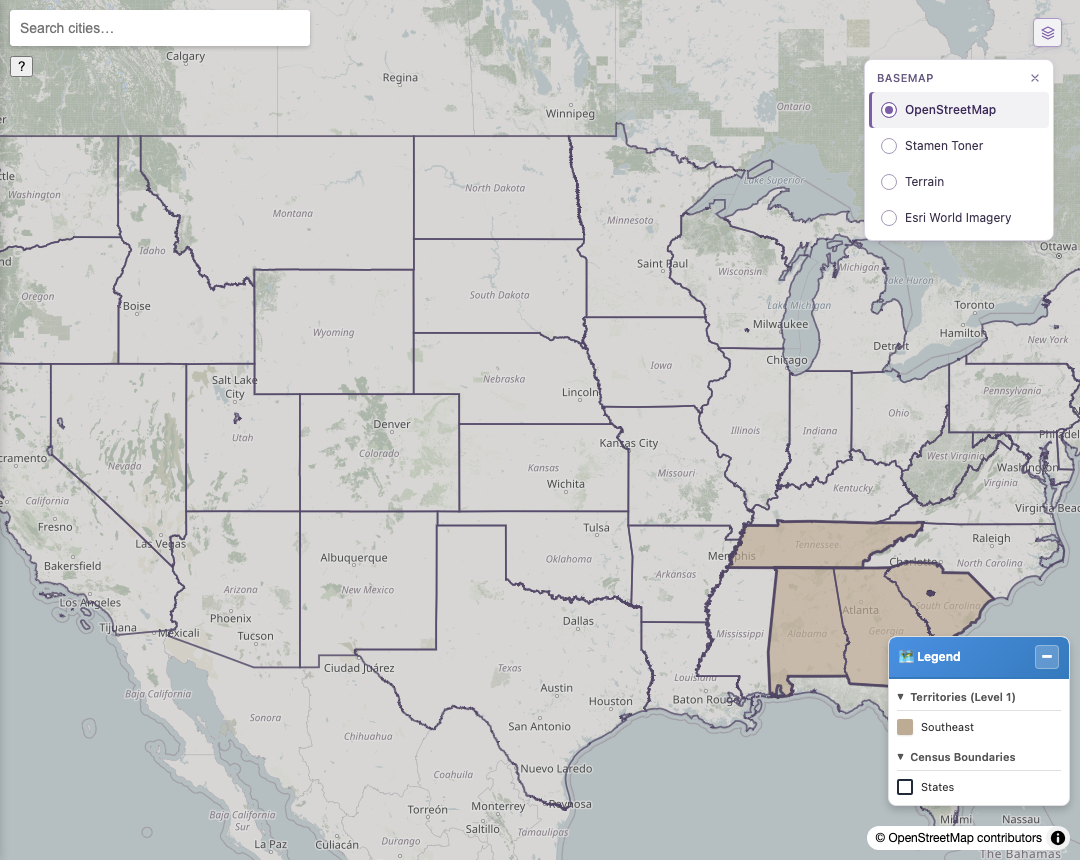
The background map. Which providers appear — and whether there is a choice at all — is set by your administrator.
Press the layers button at the top right, choose a map, close the list.
⚠️ If there is no layers button, that is not a fault. The control hides itself when only one background map is available, because a switcher offering one option is not a switcher. Which providers are available is a configuration your administrator sets.
The background map is only a backdrop. Changing it changes nothing about your territories, your selection, or what is saved.
The legend
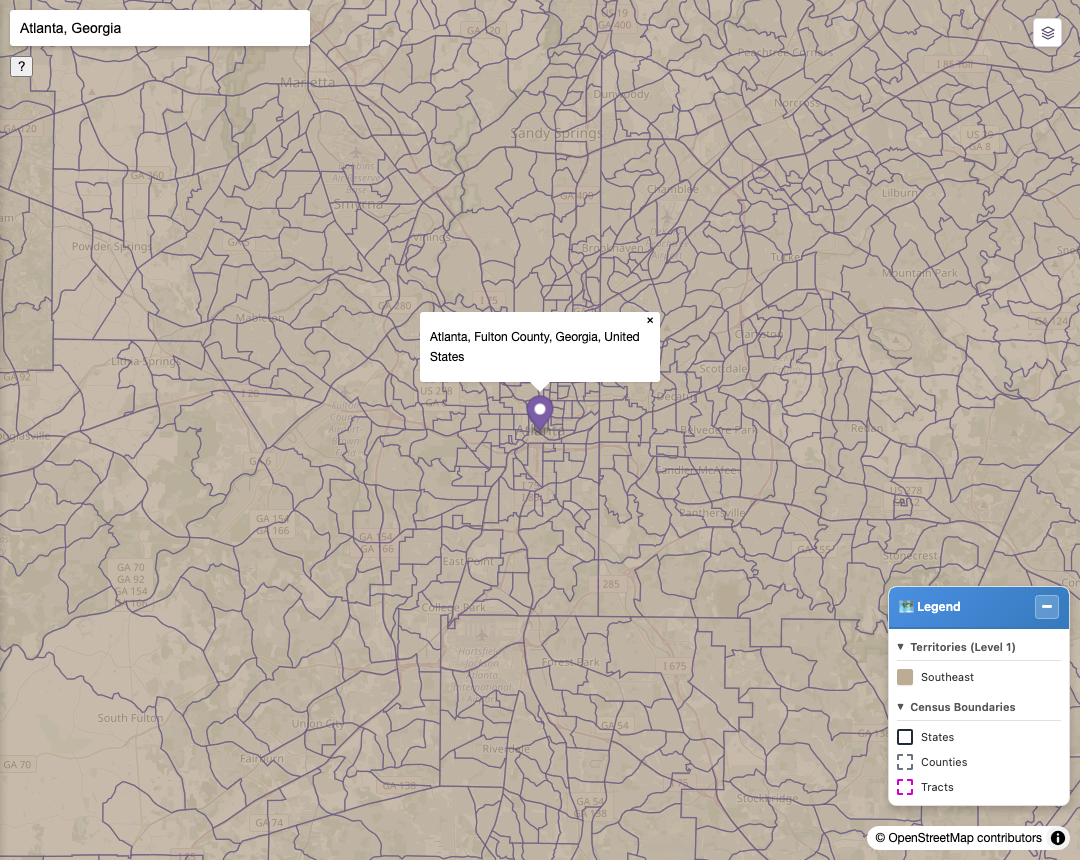
The legend names every territory currently drawn and which census boundaries are switched on. With no labels on the map itself, this is how you tell two colours apart.
🔴 The legend matters more here than on most maps, and this is why.
There are no names written on the map. No typeface has been chosen for map text yet, so every text layer is left out of what gets drawn. A territory on the map is identified by three things and only three: its colour, its position, and the legend entry that names that colour. Hovering a territory shows its name; nothing prints it onto the map.
So:
- Reading a territory's name means hovering it or reading the legend. Do not expect a label.
- Two territories in similar colours are genuinely hard to tell apart. That is a real limitation, not a display problem at your end.
- The legend also lists which census boundaries are switched on — the grey lines you see under your territories.
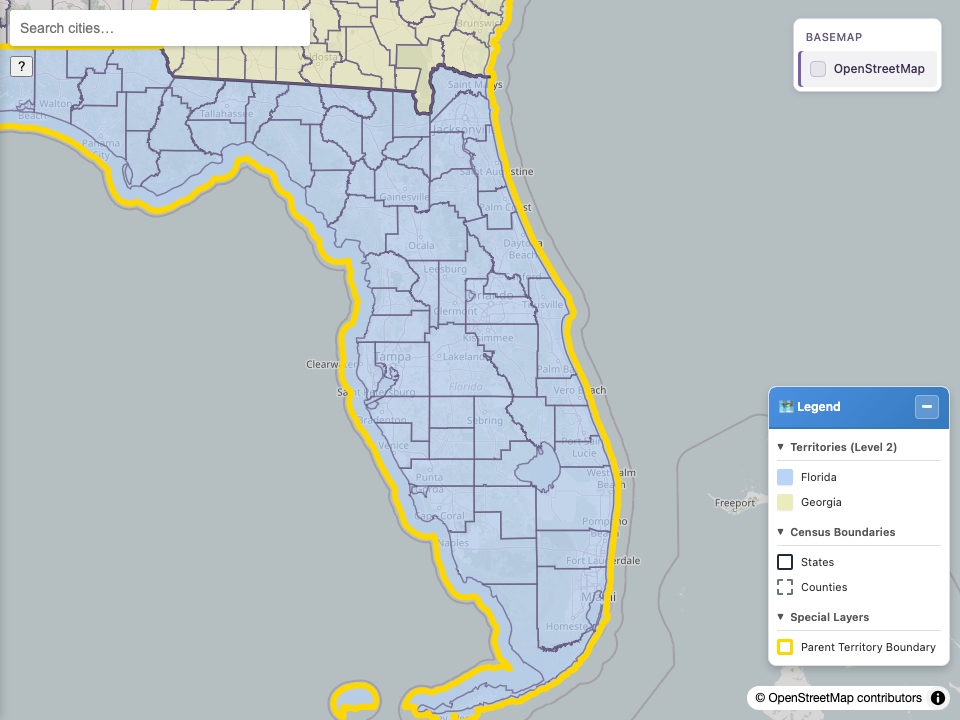
The legend at state zoom, reading a two-territory model: which territories are drawn, which census boundaries are switched on, and the Special Layers row — including the yellow parent-territory boundary a child selection is clipped to.
Special Layers is the row worth knowing about:
| Row | What it marks |
|---|---|
| Unassigned | Ground inside the model that no territory covers. The number beside it counts the pieces |
| Parent Territory Boundary | Drawn in yellow. When you are editing a child, this is the edge your selection is clipped to — you cannot select past it |
The ? button
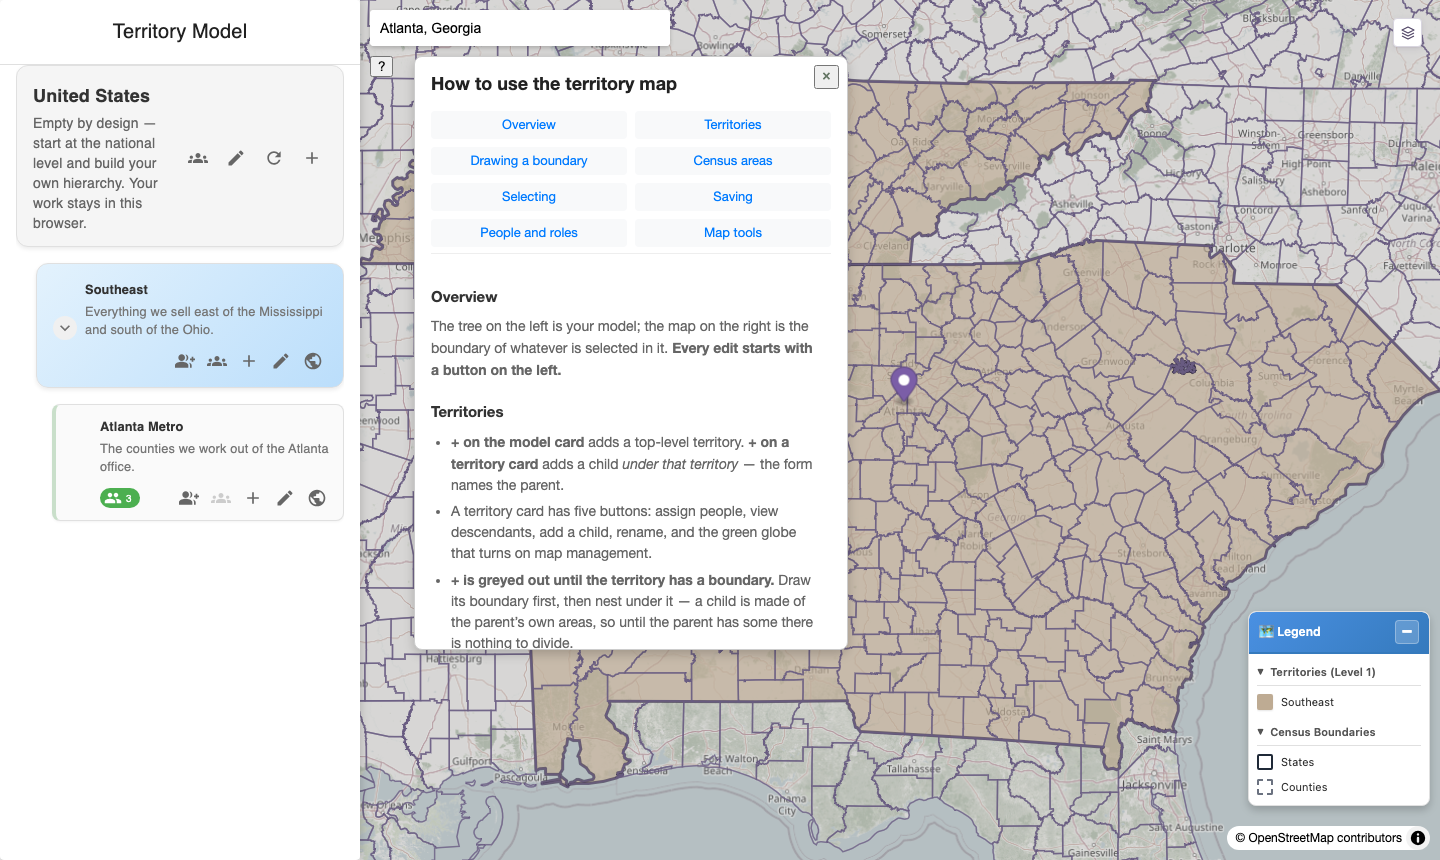
The in-app reminder, for when you are already in the map and need one line, not a page.
A short reminder of the gestures, with a link back to this site. It is deliberately brief: it answers "which key do I hold for a box?" and leaves everything else to these pages.
What is NOT on screen, and where it went
Listed because looking for a missing thing is expensive.
| Looking for | It is |
|---|---|
| A save button for the whole model | There isn't one. Each territory's boundary saves on its own, and saved boundaries take effect immediately — there is no publish step |
| An undo | There isn't one. The nearest thing is re-selecting and saving again; for a boundary, the bin clears it — see Clearing a boundary |
| A list of which records are in a territory | Not in the map. That is a Salesforce report over territory assignments |
| The exception queue | A separate Salesforce tab — The exception queue |
| Zoom buttons | Use the scroll wheel, or double-click to zoom in |
Next
Building a territory model — creating a model and putting territories in it.
Last verified: 2026-10-13 · Owner: MapKraken Labs LLC
Something on this page wrong, or a setup step missing? That is a documentation defect and we want it — tell us and this is the page that gets fixed.